Help us celebrate the 50th anniversary of the Endangered Species Act by carving out the endangered species found in the Southeast United States, including the Gulf of Mexico, U.S. Virgin Islands, and Puerto Rico.
The stencils range from beginner to advanced so there’s something for everyone! Length and width are included for each one so you can get a sense of what size pumpkin you need or you can scale them up or down when you print them out.
To get started, simply:
- Pick your favorite stencil(s)
- Download and print the stencils
- Cut out the pattern and trace, cut through the paper, or tape the pattern onto your pumpkin and cut around it.
- Cut out and/or carve away areas as indicated on each stencil’s cutting guide, or get creative with it!
- Check out our pro tips at the bottom of this page to help keep your jack-o’-lantern gourd-geous all month long!
And don’t forget to share your fa-boo-lous pumpkin masterpiece on social media! Be sure to tag us on Twitter and use #ESA50—we’d love to see them!
Disclaimer: Pumpkin carving may require the use of knives or other sharp objects. Please carefully supervise children participating in pumpkin carving.
Download the stencils (PDF, 13 pages).
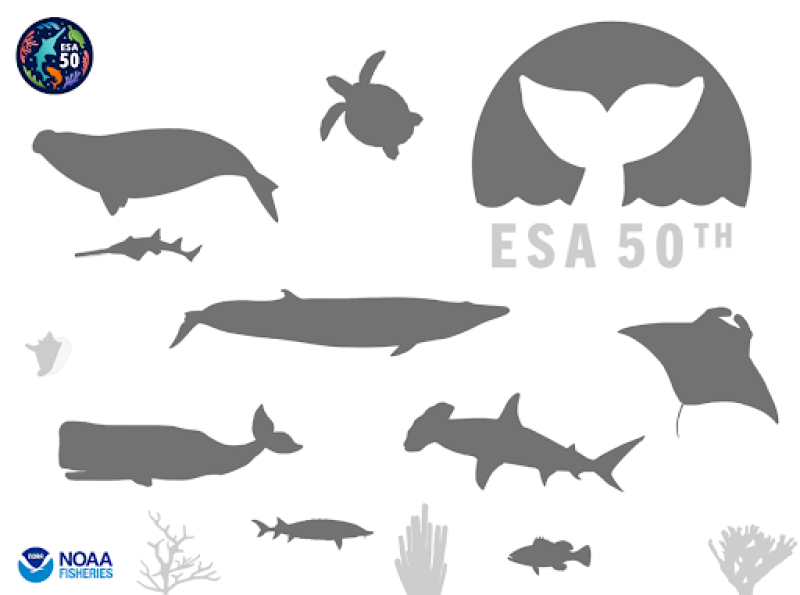
Meet the Species
- Kemp’s ridley sea turtle (and other sea turtle species)
- Sperm whale
- North Atlantic right whale
- Rice’s whale
- Scalloped hammerhead
- Nassau grouper
- Atlantic and Gulf sturgeon
- Giant manta ray
- Smalltooth sawfish
- Queen conch
- Corals
Pro Tips
- If you have fairly large areas that you're carving away, score the skin of the pumpkin with a bunch of "x" or hash patterns using a knife and then use your carving tool(s) to shave away the pumpkin skin. Pumpkin skin is tough and scoring it makes it easier to remove that tough top layer.
- Picking the right pumpkin: you want to pick pumpkins with green stems. Those with the greenest stems were harvested most recently and will last longer.
- Generally, the thickness of the stem directly relates to the thickness of the wall of the pumpkin. Thin-walled pumpkins tend to have thin stems while thick-walled pumpkins tend to have thick stems.
- You can prolong the life of the carved pumpkin by applying a thin coat of vaseline to the cut/carved areas and/or store it in the fridge. Smoothing the inside instead of leaving it rough extends the life of a jack-o’-lantern and delays decay.
- The right tools make carving a breeze! For cutting out pieces, those pumpkin carving kits with the little saws are a dream.
- Accidents happen. If part of the design breaks off, there are ways to fix it. If there’s a break, you can fix it with toothpicks, super glue, or both. For the super glue method, simply dry off the excess moisture from the broken area. Then add super glue to the broken area, affix the broken piece and hold them together for a few moments until the glue takes effect. For the toothpick method, take a couple toothpicks, trim them shorter if needed, and use them to kabob the broken piece back in place.
- If you use permanent markers (like a Sharpie) to draw on pumpkins, you can remove leftover marker using regular household rubbing alcohol and a cotton ball, cotton swab, paper towel, or similar.