Every time we put a glider in the ocean, we’re constantly afraid that something will go wrong and we won’t get it back. It could get trapped under an iceberg, hit by a passing ship, or get stuck in currents so strong that it washes up on a beach. Most of these possibilities are out of our control. For everything else that could go wrong, we follow many steps when preparing the gliders for deployment to minimize the chance that we lose one to human error.

Step one: Ballasting. When we “ballast” a glider, it means that we add or subtract weight from it so that the glider’s density matches the density of the water where it will be deployed. The density of seawater depends on its temperature and salinity: cold water is denser, or heavier, than warm water, and salty water is denser than fresh water. The water in Antarctica is much denser than the water off San Diego, so we have to add a lot of weight to the gliders. If we don’t add enough weight, the glider will have trouble diving. If we add too much weight, the glider will dive, but it will have trouble climbing to the surface.
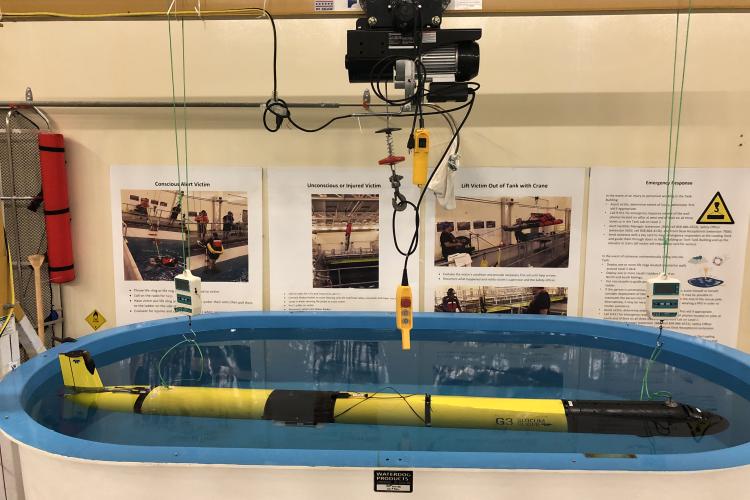
We ballast the gliders in our ballast tank at our lab. The ballast tank is filled with water from the nearby Pacific Ocean. Using suction cups, we attach spring scales to the forward and aft end of the glider to determine what it weighs in local ocean water, and then we can calculate what it should weigh in Antarctic ocean water and adjust the weight accordingly. Sometimes it takes several cycles of putting the glider in the ballast tank and adjusting the weight to get it just right.
Step two: Test dives. We are fortunate to have a large technology tank at our lab for testing oceanographic instruments. It’s about 32 feet deep and 32 feet long, which is just enough room for the glider to perform a single, shallow dive. One dive may not seem like much, but it’s enough for us to make sure that the glider dives and climbs as expected and that the science sensors are working.
Step three: Final seal. This is when we make sure that everything inside the glider is connected properly and that the sections are joined with a water-tight seal. During our last Antarctic deployment, I wrote a post paying homage to the magical o-ring, which I described as the cheapest component of the glider and the one that keeps it from flooding and sinking. It’s worth checking out, not only because I describe the final seal in detail, but because I describe my anxiety about using o-rings from a new supplier (I can laugh now because we didn’t have any leaks!).
Step four: Functional checkout. After the gliders are sealed up, we perform final system checks on every part of the gliders to make sure they’re ready. For example, we confirm that the altimeter in the nose is working so that the glider knows how deep it is and can turn around before hitting the bottom. We confirm that the tail fin moves from side to side so we can steer the glider. We confirm that the ejection weight is working properly so that the glider comes to the surface if it gets stuck under something. We confirm that the Global Positioning System (GPS) is working so that we know where the glider is each time it comes to the surface. And most importantly, we confirm that the glider can connect to Iridium so that we can talk to it throughout the deployment and give it new diving instructions or waypoints if necessary.
Step five: Compass calibration. This step is the most fun, and the subject of my next post!